


Sign up flow
Senast ändrad: 10-02-2026To start an fundraiser, you need to go through the sign up flow. Below is more information on how this works and you can set it up yourself.
Article content:
Videos
Would you rather see a video with an explanation? You can! Then click on either film below:
Sign up flow: the basics
|
00:00 - Welcome 00:13 - Intro & table of content 00:58 - Change text within sign up flow 01:53 - Change sign up options 02:14 - Moving steps within sign up flow 02:28 - Change start fundraising button 02:42 - Sign up flow step by step 03:04 - GDPR Texts an menus 03:46 - Create team page 03:56 - Default contents and settings 05:02 - Create fundraising page 05:24 - Start donation 05:57 - Overview page 06:08P - ayment page 06:22 - Thank you page |
Sign up flow: additional steps
|
00:00 - Welcome 00:41 - Registration fees 02:08 - Activities 03:21 - Editions & badges 05:26 - Countdown date 05:50 - Achievement 06:09 - Additional questions 06:28 - Webshop 07:15 - Coupons |
Options at Settings > Sign up flow

Settings > Sign up flow takes you to the page to edit your sign up flow. Here you can see a number of settings.
View sign up flow
You can always use this button to enter the sign up flow to see what it looks like. The preview mode is only meant to view the sign up flow, you cannot create fundraisers in this mode.
Sign up flow options
Here you can choose which way people can register. You have the following options:
- Individual + team + team member
- Individual only
- Team + team member
- Individual + team + team member + company
- Individual + company
You will only see the options based on the functionalities that are on. If you are not using the company functionality, then you will only see options 1, 2 and 3. If there are no teams either then you can only select individual here and the entire step in the sign up flow will be skipped.

Adjust order of steps in sign up flow

You can change the order of the first four steps. You do this by dragging them with the mouse until they are in the desired order. The other steps all have a fixed order.
Change text left side
You can change the texts listed on the left-hand side of the sign up flow. For example, if you click change behind 'Who are you'. You can then edit the text in the next screen:

If you click 'Change default value' then you can edit the text and add a description if you want. You can always go back to how it was originally by clicking 'Restore default value' again afterwards. And you change the text on the left (in the green sidebar):

You can do this for all steps.
Other matters
There are a number of other things you can set on the Settings > Sign up flow page (see also screenshot below):
- You can change the text on the fundraiser start button (this can vary per campaign/sub site). The new text (e.g. come into fundraiser, swim along, etc.) can be a maximum of 15 characters and that includes spaces.
- You can customise the texts on the selection screens. These are selection screens that you see when you click 'start fundraiser' and then have to make a choice:
- General selection screen "What do you want to take fundraiser for?". Here you choose what you want to start the fundraiser for, whether it is, for example, a general fundraiser or an fundraiser for a campaign
- Sub site selection screen "For which sub site do you want to take fundraiser?". Here you choose for which sub site you want to start an fundraiser
- Selection screen campaigns" For which campaign would you like to take fundraiser? Here you choose for which campaign you want to start an fundraiser

Sign up flow steps
The sign up flow that fundraisers see is shown based on settings. Think, for example, that you will see an extra step with registration fee, if you use that. Below, under 'Basic' you will see the steps that are normally always there and under 'Additional' the extra steps/options. Each step is described briefly below. More information on specific functionality can be found in the support articles linked to this page. You may find below a functionality that is not included in your package.
Basic
The following steps belong to the basics of the sign up flow
Sign up options: How do you commit?
Here you can see the sign up flow options and choose how you want to sign up. You can set this via Settings > Sign up flow > Registration options. You will not see this step if there is only one option, such as individual.

Profile details: Who are you?
This is where you create an account for the platform. If you already have an account then you can log in and your already known data will be filled in automatically. The mandatory fields here are First name, Last name and e-mail address and agreeing to the general terms and conditions. We can optionally or compulsorily request the following additional fields here:
- Address (Street, House number, Suffix)
- Postcode
- Location
- Country
- Gender
- Phone number (an additional opt-in will automatically be added here in accordance with telecoms legislation)

Team page
If you choose to create a team, you will be taken to the 'Your team page' page. Here you enter at least:
The team name, the amount you want to raise, the title and the motivation. You can fill in the title and motivation beforehand via the standard settings. The amount raised can be set via Settings > Set target amount. If you chose individual or team member in the previous step, skip the team page step.

Personal sponsorship page: individual
You then proceed to the page to create your individual fundraiser. Someone who creates a team in the sign up flow also creates a personal fundraiser. You can fill in the title and motivation beforehand via the standard settings. You can set the amount raised via Settings > Set target amounts. It is also possible to continue without creating an individual fundraiser if the sponsor page is optionally enabled.

Starter donation
By default, this step is on, asking the fundraiser to make an initial donation in advance. This donation is optional, but we see that it is often done. You can adjust the amounts and possibly add a description via Settings > Set donation amounts. We can also turn off the initial donation if you wish.

Overview page
Here you will see an overview of what you will order, or what you have selected. If necessary, you can choose to register another person. This way, you can create an fundraiser for several people at once and check them out.

Thank you page
When payment has been made, you come back to the thank-you page. Here you can customise both the text on the left (which is standard) and the text and image on the right. You can use this to display an image that suits your site.

Supplementary
Entry fee
You can add entry fees, if you ask for this for an event, for example. An fundraiser is required to choose an entry fee, but this could possibly be an entry fee of 0 euro.

Activities
The activities module allows you to add a (mandatory) choice question in the sign up flow. For example, a list of distances from which the fundraiser must choose, or the question of what kind of fundraiser it concerns.

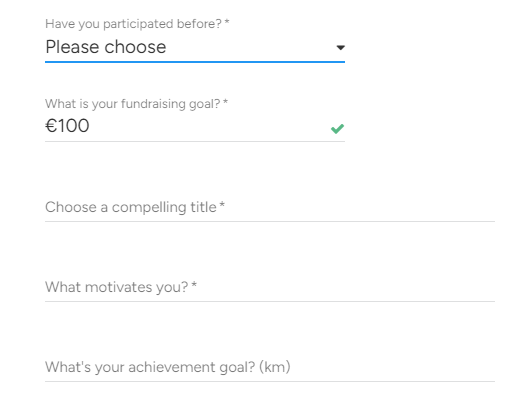
Editions: retention at events
If you use retention (editions) and an edition is set at the level you sign up at, you will be asked if you have participated before. Based on the answer, you can add badges, add a different target amount or send other emails based on the number of participations.
Date of fundraiser
There is a site setting where it is mandatory for an fundraiser to specify an end date of the fundraiser. An fundraiser then gets the mandatory question "Until when does your fundraiser run". If a general countdown date is set at the level they are notified at then the question is not asked. All underlying fundraisers will then automatically get that date as the end date.
Performance: Mileage target
If achievements are possible at the level at which you create your fundraiser, you will be asked how many kilometres the fundraiser wants to cover. This is an optional question, and if filled in then this becomes the target distance for this fundraiser.
You can also choose to leave that question away, by going to Settings > Achievements and unchecking the checkbox "Ask the participant's achievements goal in the registration flow":

Additional questions
We can add extra questions and this can be set per campaign, sub site, at the website level or across the whole site. We can ask the extra questions to fundraisers, but also specifically to team captains. With the extra questions, you can request additional information needed for your event. For example as in the example below that event participants are 18 years or older or have permission from their parent(s)/guardian(s). The answers to these extra questions are reflected in the export (of fundraisers and teams).

Webshop
In the webshop, you can offer any additional items that can be bought. You set these up via Administration > Webshop. The webshop is only accessible in the sign up flow. You cannot therefore sell items via the platform outside the sign up flow.

Discount codes
You can add discount codes and they only apply to the registration fee. That way, you can give early registrants a discount, for example, or let certain people register for free. If that functionality is on, you will see a place to enter a code at the overview screen.

After clicking, you can enter the code

And if the code is correct, the discount code will be applied to the registration fee.

 Kanske också intressant