


Achievements
Last modified: 24-12-2025View the video explaining this functionality here.
The Achievements Tracker allows campaigners to add sporting achievements to their Fundraising page. The distance covered is added up and displayed on the Fundraising page. A fundraiser can also link to a Strava account, after which new achievements are automatically added to the page!
In addition, the total distance covered by all Fundraisers is added up and displayed on the homepage.
Article content:
Achievements
A fundraiser can add Achievements by logging into the dashboard and finding the 'Achievements' tab that looks like this:

Set target
In addition to setting a target amount, a fundraiser can set a goal for their achievement. In this case, it is a certain number of kilometres. If achievements are turned on, the target distance is also (optionally) asked in the sign-up flow. You can see the new question at the bottom:

Add Achievements (manually)
The Add Achievements screen looks like this:

- First, you select a Sport. Here you can choose from Running, Hiking, Cycling, Swimming, Skating, Skeelering or Other (for all other sports).
- Next, you give the Achievements a title. This will appear at the top of your Fundraising page.
- Fill in the description of the achievement. This is optional; you can continue without filling it in.
- Fill in the date and time.
- Add your distance covered and click save.
You can see that the fundraiser has been added, and the mileage has been updated. At 'source', there is an iRaiser icon indicating that it was added via the platform.

On the front end of the Fundraising page, it looks like this:
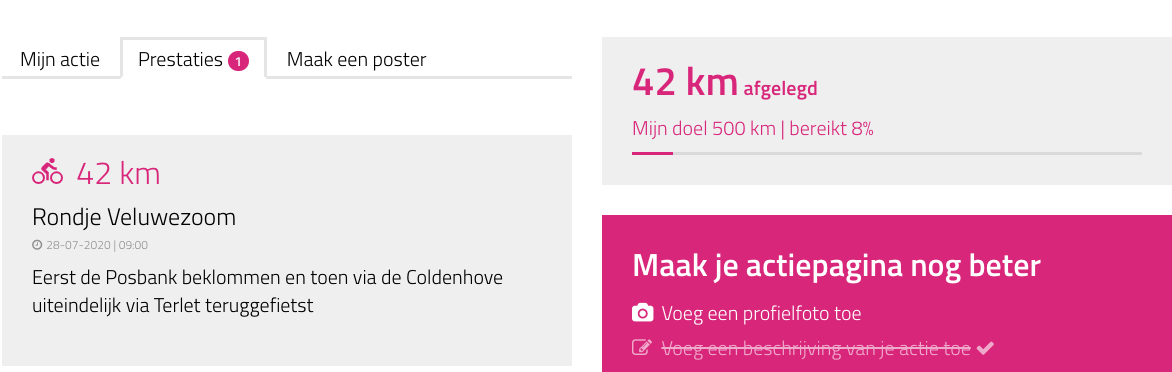 Here, 'Rondje Veluwezoom' is the Title, and the text below it is the Description.
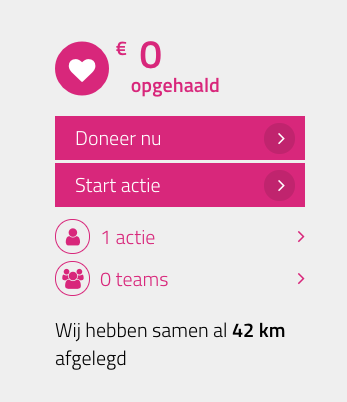
On the homepage, the number of kilometres travelled over the entire platform has been added under the donation counter:
Strava
You can also choose to link to Strava. Strava is an app that many athletes use to track their Achievements. To avoid having to enter sports Achievements in two places, we have linked to Strava.
Any activity added on Strava is forwarded to the participant's Fundraising page and filed away under the correct sport.
Before you can make use of this, a Strava app has to be created (once) for the platform:
Creating a Strava app
To connect Strava to your platform, a general link to the Strava app must be created. This can be your personal account and is purely used to establish the technical link with the platform. Nothing else happens to your information or account. The easiest way is to create a new Strava account is with a general company email address. You only need this to establish the link. No other emails will be sent to the email address (you can uncheck email updates in the sign-up process).
Once that app is installed properly, fundraisers can link to their own Strava account via the platform.
Below is a step-by-step guide to doing this.
1. Create an account at www.strava.com (this is a personal account)
2. Go (once logged in) to https://www.strava.com/settings/api
Fill in the following:
-
Name of application
Here, you fill in the desired name of the app, usually the name of the site or of your foundation
-
Category
Select 'Charitable organisation'
-
Club
This can be left blank
-
Website
Fill in the URL of the website here (starting with https://)
-
Description of application
Here, you can describe the application of the app
-
Authorisation of callback domain
Fill in oauth.kentaa.nl here
Click agree and create to continue
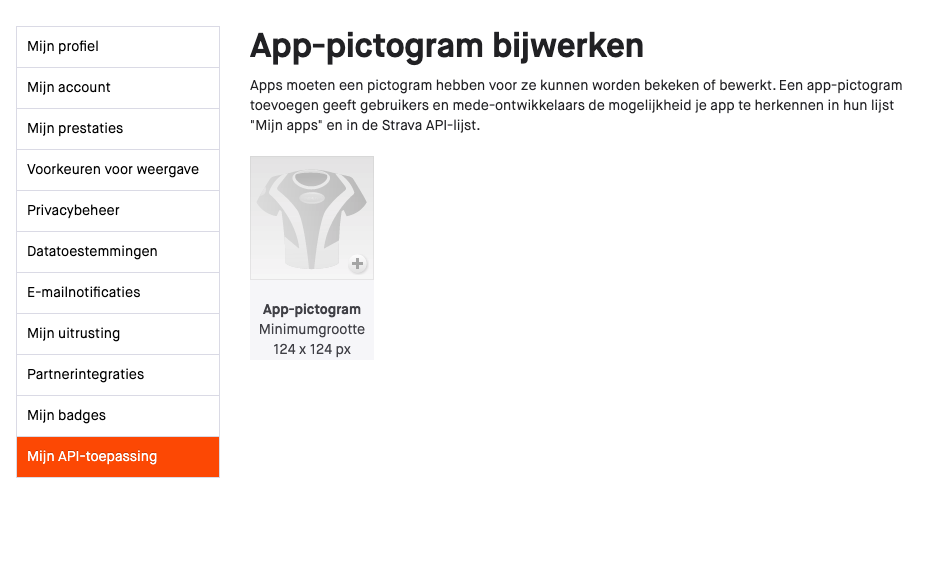
3. Next, upload your app icon
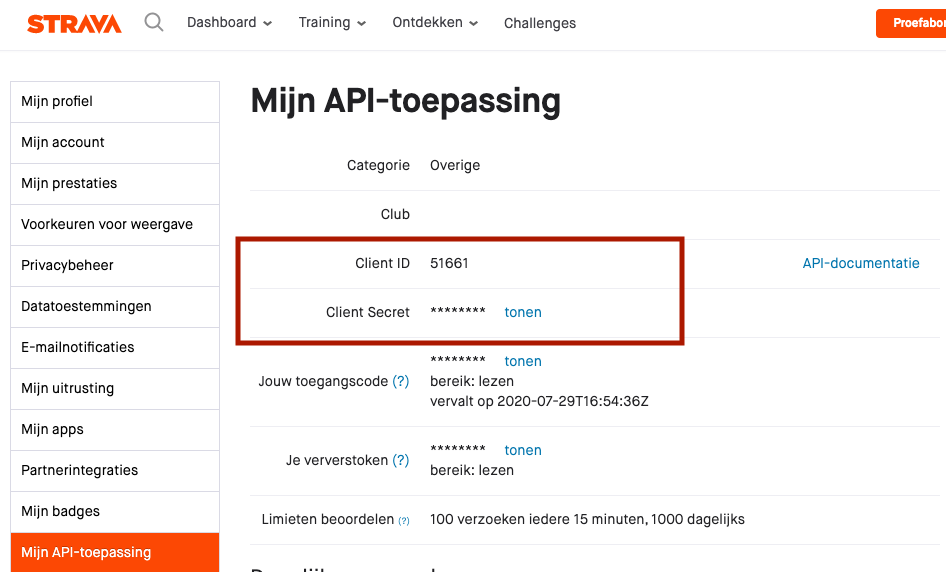
4. Then send the Client ID and Client secret to iRaiser support (you can create a new ticket for that). If we then add these to your platform, the connection is ready. Make sure you don't send a screenshot, but copy the ID and secret. Otherwise it's hard to take this over manually.
5. Increase number of athletes in app
For new apps, Strava puts a restriction on the number of athletes allowed to connect. They are by default set on 1, which practically means that only one fundraiser can connect to Strava. You need to make sure that this number is increased to 999. To increase this, they have a contact form that you can fill out. Click here for an example of how to fill out this form and here for a sample screenshot you can attach. After filling it out, Strava support will check the application. They do not provide feedback that it has been accepted, so in this case it is a matter of logging in and checking for yourself if the limit has been upped to 999.
6. Periodic reviews
Strava may periodically review apps. In such a case, they email to the email address used to create the app. It is then important to do that check, otherwise they may disable/add restrictions to the app at some point.
Linking your personal Strava account to a Fundraising page
Now that the Strava app is linked to the platform, a Strava icon will appear:
![]()
Click connect and give the app permission. Then, newly added achievements within Strava will automatically appear on the Fundraising page (this can take up to 10 minutes). Below is an example of an achievement added via the link (also note the Strava icon):
![]()
On the front end of the Fundraising page, it looks like this:
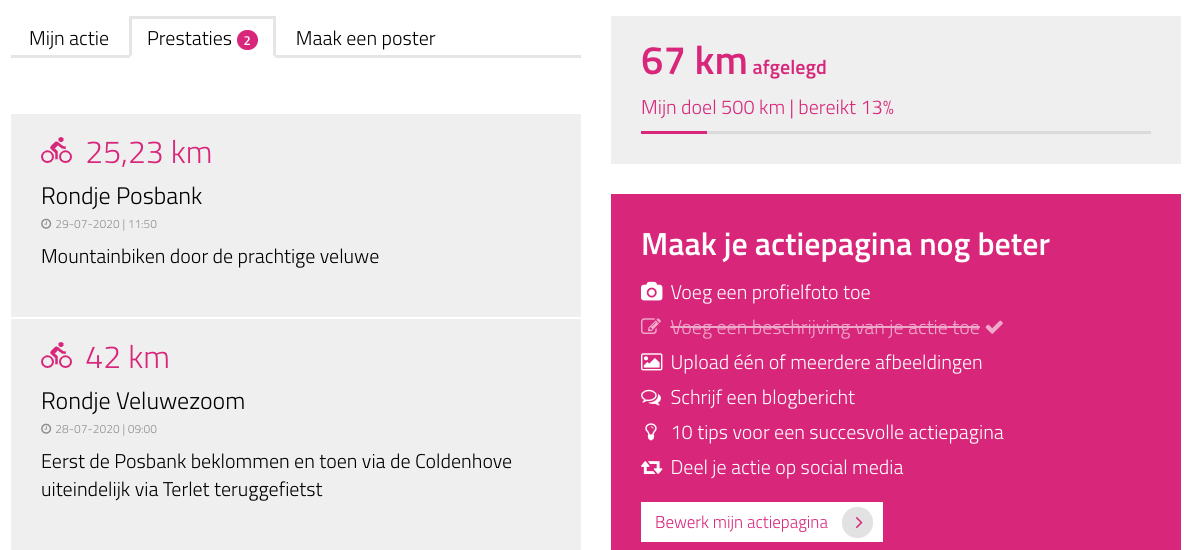
The Achievement above (25.23 km) was manually entered into Strava; therefore, no map is displayed. If a route map is available, then you will see a map of this with the Achievements. An example of this:

Photos taken during the recording of the Achievements in Strava will also be included. For example, see this hike:

Disconnect Strava
The owner of the Fundraiser page has the option to unlink Strava. This can be done from their Strava account and the Fundraiser dashboard within iRaiser. To do so, on the Achievements tab, click on the Strava disconnect cross (bottom right of the screenshot):
![]()
A site administrator cannot undo individual Strava links (unless it owns the Fundraiser page). However, a site administrator can choose to turn off Achievements at a level (e.g. for a Campaign). If that happens, all Achievements will be deleted, and links to Strava will be broken. To do this, see Turn off Achievements.
Use Achievements
You can specify per level whether you want to use Achievements. You can turn it on or off at the Website level and per Sub site or Campaign. You can also specify whether you want to see the number of kilometres travelled on the counter. You can set this at Sub site or Website level via Settings > Achievements.
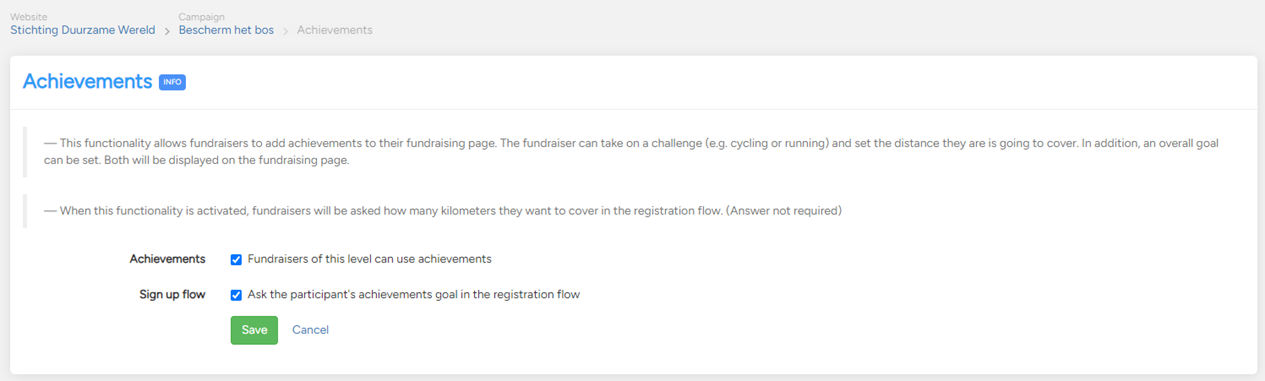
Turn off Achievements
If no Achievements have been added under a Campaign, then you can turn Achievements on or off with no consequences. If Achievements have already been added, when you turn them off (by unchecking that Achievements may be used), you will get a notification indicating how many Strava links and achievements will be removed.
![]()
Turning off Achievements can be useful for resetting mileage back to zero, for example, in a challenge that lasts a month and has a certain start date. However, in such a case, it is important to inform the fundraisers. Their previous Achievements and target mileage will be removed, so they need to reconnect with Strava.
Visibility
If you turn off the 'Show the number of kilometres travelled on the page' button, no total kilometres will be shown with the donation counter. This can be useful if you don't want to show the final result of the challenge yet, or if the total number of kilometres is irrelevant at that location. You can only set this at Website and Sub site level.
Excel file
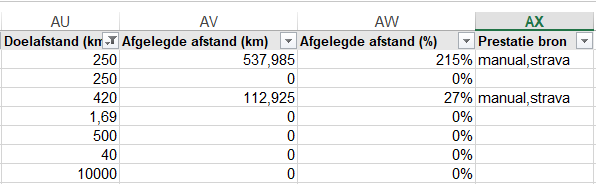
If you create an export of all Fundraiser pages and use the performance tracker, the export will have four related columns. The columns are Target Distance, Distance Traveled (km), Distance Traveled (%) and Achievements Source.
Distance travelled (%) shows the percentage to which the target distance was achieved. At Achievements Source you can see in what way(s) achievements have been added.
Target distance reached email
If you have achieved the target distance, an automatic email will be sent (provided it is on). This looks as follows:

You can customise the mail as you wish via Emails > Email overview > Fundraisers > Performance goal of the fundraiser has been reached.
Achievements in the spotlight
Fundraisers can only find Achievements when they log in to their personal dashboard. It is not shown during the creation of a Fundraising page, so it is important to bring it to their attention. Below are several ways you could do this:
News release
If several Fundraising pages have already been created and you want to reach out to the fundraisers, you can do this through a news release. You can create and publish a news release and you can choose to share the message with the existing fundraisers. That way, you can make them aware of the new functionality!
Menu page explaining Achievements
You can also create a Menu page explaining how Achievements work and how you use the functionality. You could also refer to this in the automatic emails or in a news item. Do you get questions from fundraisers about Achievements? Then include these in a frequently asked questions block!
Automatic email
The best way to make new fundraisers aware of the Achievements is via an email that every fundraiser receives. In it, point them to the possibilities of adding Achievements.
You can choose to include Achievements in the email sent to fundraisers after they create their page, but also, for example, the email sent three days after creating a fundraising page.
Would you like an example text for an automatic mail or Menu page? Then click here for a PDF file with texts and screenshots you could use! You can also create a news item based on this.
We can turn on Achievements directly for all our generic templates. If you would like to have this feature turned on, please create a new support ticket and we will enable the functionality. If you also send us the Client ID and Client Secret, we can link to Strava directly.
 Frequently asked questions
 Perhaps also interesting